The Permatex Windshield Repair Kit is a popular solution for fixing chips and cracks‚ offering a quick and effective way to prevent further damage and avoid costly replacements.
Understanding the Components
The Permatex Windshield Repair Kit includes essential tools designed to make chip and crack repairs straightforward. The kit typically contains resin‚ a syringe for applying the resin‚ curing film to help the resin dry and seal the glass‚ and a scraper or tool for removing excess resin. The resin is the core component‚ formulated to bond with the glass and restore clarity. The syringe allows precise application‚ ensuring the resin fills the chip or crack evenly. The curing film protects the repair from dust and helps the resin harden properly. Additional items like alcohol wipes may be included for cleaning the damaged area. Understanding each component’s role is crucial for a successful repair. Proper use of these tools ensures a professional-grade fix that prevents further damage and restores your windshield’s integrity.

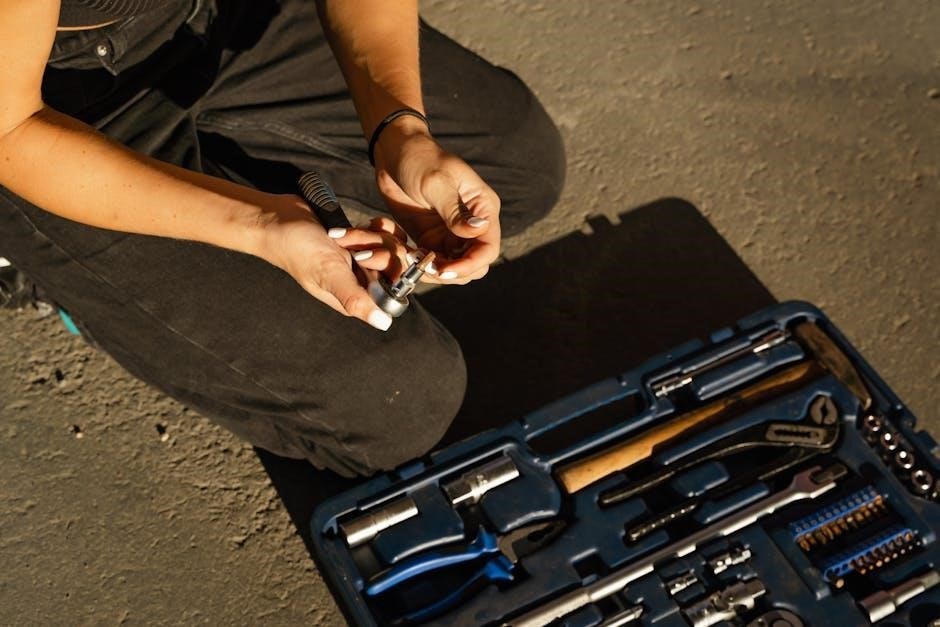
Tools and Materials Needed
Besides the Permatex Windshield Repair Kit‚ you’ll need a few additional tools and materials to ensure a successful repair. A clean‚ lint-free cloth or microfiber towel is essential for cleaning the damaged area and wiping away excess resin. A rubber bulb or syringe (if not included) helps apply even pressure to inject the resin. Protective gear like latex gloves and eye protection is recommended to handle chemicals safely. A well-ventilated workspace is crucial to avoid inhaling fumes. Optional tools include a UV curing light for faster drying and a windshield repair bridge to stabilize the glass. Ensure all materials are ready before starting to streamline the process. Proper preparation and having the right tools on hand will contribute to a professional-quality repair and minimize the risk of complications during the procedure.
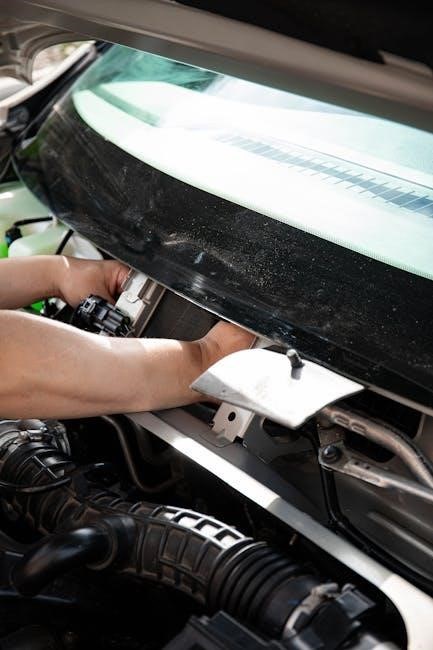
Preparing the Windshield
Before starting the repair‚ ensure the windshield is clean and free of debris. Use a glass cleaner and a microfiber cloth to thoroughly clean the damaged area and surrounding glass. Inspect the chip or crack to remove any loose particles or moisture‚ which could interfere with the repair. If the damage is deep or has sharp edges‚ lightly sand the area with fine-grit sandpaper to smooth it out. Once clean and dry‚ apply the resin stabilizer (if provided) to the affected area to prevent further spreading. Allow it to dry completely as per the product instructions. Proper preparation ensures better adhesion of the repair resin and a more effective fix. A clean‚ dry‚ and stable surface is essential for achieving long-lasting results with the Permatex Windshield Repair Kit.
Safety Precautions
Always wear protective gloves and work in a well-ventilated area. Avoid skin contact with repair materials. Keep the kit out of children’s reach and follow instructions carefully to ensure safety and effectiveness.
5a. Handling Chemicals
When using the Permatex Windshield Repair Kit‚ it is essential to handle the included chemicals with care. Always read the instructions thoroughly and understand the properties of the resin and other materials. Wear protective gloves to prevent skin contact‚ as some chemicals may cause irritation. Avoid inhaling fumes by working in a well-ventilated area. Keep the kit away from open flames or sparks‚ as certain components may be flammable. Never mix chemicals from the kit with other substances unless explicitly instructed. If accidental contact occurs‚ rinse thoroughly with water and seek medical attention if irritation persists. Proper disposal of leftover materials is also crucial to avoid environmental contamination. Follow all safety guidelines to ensure a safe and effective repair process.
5b. Protective Gear
Wearing appropriate protective gear is crucial when using the Permatex Windshield Repair Kit to ensure your safety. Start by putting on a pair of latex or nitrile gloves to prevent skin contact with the resin and other chemicals‚ which may cause irritation. Additionally‚ wear protective goggles or safety glasses to shield your eyes from any accidental splashes or debris; A face mask is also recommended to avoid inhaling fumes from the resin or curing agents. Ensure all gear fits properly and is free from defects. Avoid touching your face or eyes while handling the materials. Proper protective equipment minimizes risks and ensures a safe repair process. Always prioritize your safety to avoid potential harm from the chemicals and materials involved in the windshield repair process. This precautionary measure is essential for a successful and hazard-free repair experience.
5c. Ventilation
Proper ventilation is essential when working with the Permatex Windshield Repair Kit to prevent inhaling harmful fumes from the resin and curing agents. Ensure you work in a well-ventilated area‚ such as an open garage or outdoors‚ to allow fresh air to circulate. Open windows and doors to maximize airflow‚ and consider using a fan to direct fumes away from your workspace. Avoid breathing directly over the repair area‚ as the vapors can irritate the respiratory system. If ventilation is inadequate‚ wear a mask with a filter to minimize inhalation of airborne chemicals. Proper ventilation not only protects your health but also ensures the resin cures correctly by preventing moisture buildup. Always prioritize a well-ventilated workspace to maintain safety and achieve optimal repair results. This step is critical for both your well-being and the success of the windshield repair process.
5d. Disposal
Proper disposal of materials from the Permatex Windshield Repair Kit is crucial to maintain environmental safety and compliance with local regulations. Always wear protective gloves when handling leftover materials to avoid skin contact. Dispose of unused resin‚ syringes‚ and curing film in accordance with local hazardous waste guidelines. Do not discard these items in regular trash unless explicitly allowed. If rags or paper towels were used to clean spills‚ seal them in an airtight bag before disposal to prevent vapors from spreading. Never pour chemical residues down drains‚ as they can harm water systems. Check if empty resin cartridges can be recycled in your area. Follow all instructions provided with the kit for specific disposal recommendations. Proper disposal ensures environmental protection and adheres to safety standards‚ making it a critical step in the repair process. Always prioritize responsible waste management to safeguard health and the environment.
Repair Process
The repair involves assessing damage‚ cleaning the area‚ preparing the syringe‚ applying resin‚ injecting it into the chip‚ using curing film‚ and removing air bubbles for a smooth finish.
6a. Assessing the Damage
Before starting the repair‚ carefully inspect the windshield chip or crack to determine its size‚ shape‚ and depth. Ensure the damage is within the repairable size limit specified in the Permatex Windshield Repair Kit instructions‚ typically up to 1 inch in diameter for chips and 12 inches for cracks. Clean the area to visualize the damage clearly; Check for any loose glass fragments or debris that may interfere with the repair process. Use the template provided in the kit to outline the damage and ensure proper alignment. If the damage is too large or in a critical area‚ such as the driver’s line of sight‚ professional replacement may be necessary. Proper assessment ensures the repair is effective and prevents further spreading of the damage. Taking the time to evaluate the damage accurately is crucial for a successful repair outcome.
6b. Cleaning the Area
Clean the damaged area thoroughly using the glass cleaner and microfiber cloth provided in the Permatex Windshield Repair Kit. Gently wipe away dirt‚ oil‚ or debris that may interfere with the repair. Avoid using household cleaners‚ as they may leave residues that could affect the resin’s adhesion. Ensure the windshield is dry and free of moisture‚ as this is critical for proper bonding; If necessary‚ use a clean‚ lint-free cloth to dry the area completely. Inspect the cleaned area for any remaining streaks or residue and repeat the cleaning process if needed. A clean surface is essential for the resin to adhere properly‚ ensuring a strong and durable repair. Proper preparation at this stage significantly impacts the final result. Take your time to ensure the area is spotless before proceeding to the next step.
6c. Preparing the Syringe
Once the area is clean and dry‚ attach the syringe to the windshield repair device‚ ensuring it is securely locked in place. Fill the syringe with the provided resin‚ being careful not to overfill it. Remove any air bubbles by gently tapping the syringe or squeezing it lightly. Ensure the needle is free from obstructions and align it with the damaged area. Avoid touching the needle tip to prevent contamination. If the syringe is not pre-filled‚ use the resin bottle to fill it‚ ensuring no air enters the syringe. Double-check that the syringe is properly seated and aligned before proceeding. Proper preparation of the syringe is crucial for a smooth and effective injection of the resin into the damaged area. Handle the syringe with care to avoid accidental spills or damage to the needle. Ensure the syringe is ready for injection before moving to the next step.
6d. Applying the Resin
Once the syringe is prepared‚ carefully align the needle with the center of the windshield chip or crack. Gently push the syringe to inject the resin slowly and evenly into the damaged area. Ensure the resin spreads fully‚ filling the crack from the bottom up. Avoid applying too much pressure‚ which could cause the resin to overflow or create air bubbles. If bubbles form‚ stop immediately and gently tap the windshield to help them rise to the surface. Allow the resin to flow naturally into the crack‚ ensuring complete saturation. Once the crack appears filled‚ remove any excess resin from the surface using a clean cloth or paper towel. Inspect the area to confirm the resin has fully penetrated and filled the damage. Proper application ensures a strong and durable repair‚ minimizing the appearance of the chip or crack. This step requires patience and precision to achieve the best results.
6e. Injecting Resin
Hold the syringe firmly and insert the needle into the center of the windshield chip or crack at a slight angle. Slowly depress the plunger to inject the resin into the damaged area. Ensure the resin flows evenly‚ filling the crack completely. If air bubbles appear‚ stop injecting and gently tap the windshield to help the bubbles rise to the surface. Resume injecting once the bubbles have cleared. Continue until the crack is fully saturated and no air remains. Avoid over-injecting‚ as this can cause excess resin to spread unnecessarily. Once the injection is complete‚ remove the syringe and wipe away any excess resin with a clean cloth. Inspect the area to ensure the resin has fully penetrated the crack. Proper injection ensures a strong bond and minimizes the visibility of the repair. This step requires careful attention to detail to achieve optimal results.
6f. Using the Curing Film
Once the resin is injected‚ carefully peel the backing from the curing film and place it over the repaired area‚ ensuring it is centered and smooth. Gently press the film to remove any air bubbles‚ making sure it adheres evenly to the windshield. The curing film is designed to trap UV light‚ which helps harden the resin. Leave the film in place for the recommended amount of time‚ usually a few hours‚ depending on the kit instructions. Avoid exposing the windshield to direct sunlight during the curing process‚ as this can cause overheating. After the curing period‚ remove the film and inspect the repair. The film ensures the resin dries properly‚ creating a clear and durable bond. Proper use of the curing film is essential for a successful and long-lasting repair. Follow the instructions carefully to achieve the best results.
6g. Removing Bubbles
Air bubbles can form during the resin injection process‚ which may compromise the repair’s effectiveness. To remove bubbles‚ use a fine needle or pin to gently prick the bubble. Slowly inject a small amount of additional resin into the affected area‚ filling the void left by the bubble. Use the curing film to help flatten and spread the resin evenly‚ ensuring no air pockets remain. If bubbles persist‚ repeat the process carefully to avoid creating new ones. It’s important to address bubbles immediately‚ as they can lead to incomplete sealing or reduced clarity. Once all bubbles are removed‚ allow the resin to cure under the film as instructed. Patience and attention to detail are key to achieving a smooth‚ bubble-free repair. Properly removing bubbles ensures the windshield repair is both durable and visually clear.
After the Repair
Once the resin is fully cured and the curing film has been removed‚ inspect the repaired area to ensure it is smooth and free of imperfections. Allow the windshield to sit for at least 24 hours before exposing it to direct sunlight‚ rain‚ or extreme temperatures. Avoid using windshield wipers or cleaners on the repaired area during this time to prevent damage or contamination. For the next few days‚ monitor the repair for any signs of failure‚ such as water seepage or clarity issues. If everything looks good‚ the windshield is ready for normal use. Proper post-repair care ensures the longevity and effectiveness of the fix. Always follow the manufacturer’s guidelines for post-repair maintenance to guarantee a durable and reliable outcome.

Curing Process
The curing process is a critical step in ensuring the windshield repair is effective and long-lasting. After applying the resin and sealing it with the curing film‚ allow the repair to cure at room temperature (approximately 70-75°F) for 10-15 minutes. The curing film helps block out UV light and creates a flat surface for the resin to cure properly. Avoid touching or disturbing the repaired area during this time. Once cured‚ carefully peel off the curing film and discard it. The repair should now be hard and smooth to the touch. For optimal results‚ allow the windshield to sit for at least 24 hours before exposing it to direct sunlight‚ rain‚ or extreme temperatures. Proper curing ensures the resin fully bonds with the glass‚ restoring strength and clarity to the windshield.
Post-Repair Care
Avoid exposing the repaired windshield to direct sunlight‚ rain‚ or extreme temperatures for 24 hours. Keep the area clean and dry to ensure proper bonding and clarity.
9a. Avoiding Contaminants
After repairing your windshield with the Permatex Windshield Repair Kit‚ it’s crucial to avoid contaminants to ensure the resin fully cures and bonds properly. Keep the repaired area clean and dry‚ avoiding exposure to dirt‚ dust‚ or chemicals. Do not touch the repaired area‚ as oils from your skin can interfere with the curing process. Avoid using windshield cleaners or glass treatments for at least 24 hours. If you must clean the windshield‚ use a soft‚ dry microfiber cloth to gently wipe away any debris. Avoid driving through automatic car washes or exposing the vehicle to harsh weather conditions during the curing period. Contaminants can weaken the repair or cause discoloration‚ so careful attention is essential for long-lasting results.
9b. Following Care Instructions
Proper care after using the Permatex Windshield Repair Kit is essential for ensuring the repair lasts and maintains its integrity. Always follow the manufacturer’s instructions closely to avoid compromising the resin bond. Allow the repaired area to cure completely as directed‚ typically 24 hours‚ before exposing the windshield to water or cleaning products. Avoid using high-pressure washes or abrasive materials‚ as they can damage the repair. For cleaning‚ use a mild glass cleaner and a soft‚ lint-free cloth to wipe the area gently; Avoid placing stickers or decals near the repaired area‚ as adhesives can interfere with the resin. Regularly inspect the repair for any signs of deterioration‚ such as cracks or discoloration. By adhering to these care guidelines‚ you can ensure the repair remains effective and extends the life of your windshield.
9c. Avoiding Direct Sun
Avoiding direct sunlight is crucial after using the Permatex Windshield Repair Kit‚ as UV rays and heat can affect the integrity of the repair. Direct sun exposure can cause the resin to cure unevenly or become brittle over time‚ potentially weakening the bond between the glass and the resin. Prolonged exposure may also lead to discoloration or bubbles forming in the repaired area. To protect the repair‚ park your vehicle in a shaded area or use a sunshade whenever possible‚ especially during the curing process. If direct sun exposure is unavoidable‚ ensure the windshield is treated with a UV-protective glass treatment to minimize damage. Regular inspection of the repair area will help identify any issues early on‚ allowing for prompt action to maintain the effectiveness of the repair.
9d. Monitoring the Repair
Monitoring the repair after using the Permatex Windshield Repair Kit is essential to ensure its longevity and effectiveness. Regularly inspect the repaired area for any signs of failure‚ such as new cracks‚ bubbles‚ or resin discoloration. Check the repair daily for the first week and at least weekly thereafter. Look for clarity in the glass; if the area becomes hazy or opaque‚ it may indicate a failed repair. Avoid exposing the windshield to extreme temperatures or humidity‚ as this can weaken the bond between the resin and the glass. If you notice any issues‚ seek professional assistance immediately to prevent further damage. Proper monitoring ensures the repair remains durable and maintains the integrity of your windshield‚ providing a clear and safe view while driving.

Common Mistakes to Avoid
When using the Permatex Windshield Repair Kit‚ there are several common mistakes to avoid for a successful repair. One of the most frequent errors is not properly cleaning and preparing the damaged area before applying the resin. Dirt‚ moisture‚ or debris can prevent the resin from bonding effectively‚ leading to a failed repair. Another mistake is using too much resin‚ which can create a mess and make the curing process difficult. Additionally‚ some users neglect to follow the curing time instructions‚ either rushing the process or letting it cure for too long‚ which can compromise the repair’s integrity. Improper use of the curing film‚ such as not sealing it tightly‚ can also lead to air bubbles or uneven curing. Lastly‚ ignoring environmental factors like direct sunlight or extreme temperatures during the repair can negatively impact the outcome. By avoiding these common pitfalls‚ you can achieve a professional-quality windshield repair.
Troubleshooting
-
11a. Air Bubbles
Use a pin to gently burst bubbles before curing to ensure a smooth finish.
-
11b. Incomplete Sealing
Apply additional resin if areas remain unsealed after curing.
-
11c. Resin Drying Issues
Work in a cooler‚ shaded area to slow drying for better control.
Air bubbles are a common issue during windshield repair. They can form when resin is injected too quickly or unevenly‚ trapping air within the glass layers. To address this‚ use a fine pin or needle to carefully pierce and burst the bubbles. Gently press the surrounding area with a credit card or similar tool to flatten the resin and eliminate trapped air. Ensure the syringe is held at the correct angle to prevent air from entering the glass. If bubbles persist‚ allow the resin to cure slightly before reapplying heat or pressure. Proper technique and patience are key to achieving a smooth‚ bubble-free repair. Regularly inspect the injection process and adjust as needed to minimize air entrapment.
Incomplete sealing can occur if the resin does not fully bond with the glass or if the damage is not properly filled. This issue often arises from insufficient resin application‚ improper syringe alignment‚ or uneven pressure during injection. To fix this‚ carefully remove any excess resin with a razor blade and clean the area with a lint-free cloth. Reapply a small amount of resin‚ ensuring the syringe tip is deeply seated into the damage. Use a credit card or similar tool to spread the resin evenly‚ applying gentle pressure. Allow the resin to cure fully before inspecting the repair. If the seal remains incomplete‚ repeat the process‚ ensuring the glass surface is clean and free of contaminants. Proper preparation and technique are essential for achieving a complete‚ lasting seal.
Resin drying issues can hinder the effectiveness of the repair. If the resin takes too long to cure or doesn’t harden properly‚ it may be due to environmental factors like high humidity or low temperatures‚ which slow the curing process. Ensure the repair area is clean and dry before applying resin‚ as moisture or contaminants can prevent proper adhesion. Using the incorrect mixing ratio of resin to hardener or applying too thin a layer can also cause drying problems. To resolve this‚ allow the resin to cure in a well-ventilated‚ temperature-stable environment. If the resin is still tacky‚ gently wipe away excess with a lint-free cloth and reapply a small amount‚ ensuring proper coverage. Avoid direct sunlight‚ as it can cause uneven drying. Proper preparation and adherence to instructions are key to achieving a successful repair.
With the Permatex Windshield Repair Kit‚ you’ve successfully addressed chips or cracks in your windshield‚ preventing further damage and costly replacements. By following the step-by-step instructions and adhering to safety precautions‚ you’ve ensured a professional-grade repair. The kit’s effectiveness lies in its ability to seal damages promptly‚ restoring clarity and structural integrity to your windshield. Regular monitoring of the repair and proper post-care will ensure its longevity. Remember to avoid contaminants and direct sunlight during the curing process for optimal results. This DIY solution is both time-efficient and cost-effective‚ making it an ideal choice for car owners seeking a reliable fix. By completing the process‚ you’ve not only saved money but also extended the life of your windshield‚ ensuring safety and visibility on the road ahead.
Additional Resources
For further guidance and support‚ refer to the following resources:
- Permatex Official Website, Explore detailed product information‚ tutorials‚ and FAQs.
- Permatex Customer Support — Contact their team for assistance or additional repair tips.
- YouTube Tutorials — Watch video guides for hands-on instruction.
- Reddit Automotive Communities ⏤ Engage with experts and DIY enthusiasts for advice.
- Auto Repair Manuals ⏤ Find comprehensive guides for windshield repair best practices.
- Local Auto Shops — Consult professionals if additional assistance is needed.
These resources provide extensive support to ensure your repair is successful and long-lasting.
Frequently Asked Questions
Here are some common questions about using the Permatex Windshield Repair Kit:
- Q: How long does the repair take?
A: Repairs typically take 30-45 minutes‚ depending on the damage size. - Q: Will the kit work for all chip sizes?
A: It works best for chips up to 1 inch in diameter and shallow cracks. - Q: Is the repair invisible?
A: While the repair strengthens the glass‚ some visibility may remain. - Q: Can I drive immediately after repair?
A: Allow at least 1 hour before driving‚ longer in cooler temperatures. - Q: How long does the resin take to cure?
A: Full curing occurs within 24-48 hours‚ depending on conditions. - Q: What causes air bubbles?
A: Bubbles form from trapped air; use the included tool to remove them. - Q: Is the kit reusable?
A: No‚ it’s designed for a single use to ensure optimal results.
These answers address common concerns to help you achieve a successful repair.
No Responses